When the kitchen lights flickered and the oven was still cold, I was staring at a handful of chicken breasts that had been sitting in my fridge for days. A neighbor had challenged me to whip up something that would impress at a last‑minute dinner, and I was determined to rise to the occasion. The scent of garlic began to rise as I chopped the cloves, and the sound of the skillet heating up felt like a drumbeat of anticipation. I imagined the moment when the golden crust would crackle, releasing a buttery aroma that would fill the entire house. That instant, I knew this dish would be more than a meal—it would be a memory. Let me walk you through every single step — by the end, you'll wonder how you ever made it any other way.
Most recipes get this completely wrong. They over‑season, under‑baste, or forget that the butter should be infused with herbs before it meets the chicken. I dare you to taste this and not go back for seconds. This is hands down the best version you'll ever make at home. The butter coats the chicken like velvet, and the herbs whisper through each bite. The lemon splash at the end brightens everything, turning a simple plate into a symphony of flavors. Picture yourself pulling this out of the oven, the whole kitchen smelling incredible, and knowing that every bite is a triumph.
If you've ever struggled with chicken that turns out dry or bland, you're not alone—and I've got the fix. The trick lies in a quick sear that locks in juices, followed by a slow roast that allows the herbs to mingle. I’ll keep the process simple, yet the result is a juicy, herb‑laden masterpiece that feels like a gourmet creation. The secret sauce is a buttery garlic mixture that bakes with the chicken, infusing every crumb with savory depth. The final squeeze of lemon adds a bright counterpoint, ensuring the dish never feels heavy. This version stands out because it marries technique with bold flavor, delivering a dish that satisfies both the palate and the soul.
And now the fun part. You’ll learn how to get that perfect crust, how to keep the inside tender, and how to finish with a sauce that sings. Stay with me here — this is worth it. The moment of truth comes when the thermometer reads 165°F, and the aroma signals that the chicken has reached its peak. I’ll walk you through each step, and you’ll see how a few small adjustments make all the difference. By the time you plate it, you’ll have a dish that looks as good as it tastes, ready to wow anyone who walks into the kitchen.
What Makes This Version Stand Out
- Flavor: The combination of fresh thyme, rosemary, and parsley creates a layered, aromatic profile that elevates simple chicken into a culinary delight. Each herb brings its own character—thyme’s earthiness, rosemary’s piney bite, and parsley’s bright citrus note—making the dish complex yet harmonious. The result is a sauce that coats the meat like velvet, delivering a mouth‑watering finish.
- Texture: A quick sear forms a golden crust that locks in moisture, while a slow oven roast ensures the interior stays tender and juicy. The butter infusion creates a silky mouthfeel, and the garlic adds a subtle crunch that contrasts beautifully with the softness of the chicken. The final sauce glistens, giving the dish a luxurious sheen.
- Simplicity: With just ten ingredients and a handful of kitchen tools, this recipe is approachable for any home cook. No fancy gadgets are required—just a skillet, a baking dish, and a thermometer. The steps flow naturally, making the process feel effortless.
- Uniqueness: Unlike most chicken recipes that rely on heavy sauces or marinades, this version uses a buttery herb infusion that keeps the chicken light yet flavorful. The lemon finish adds a bright twist that sets it apart from conventional roasted chicken.
- Crowd Reaction: Friends who have tried this dish often say it tastes like a restaurant favorite. The savory, herbaceous flavors and the juicy texture make it a hit at gatherings. It’s a conversation starter that invites compliments.
- Ingredient Quality: Fresh herbs, high‑quality butter, and a good olive oil elevate the dish beyond the average chicken recipe. The use of fresh thyme, rosemary, and parsley ensures maximum flavor extraction.
- Cooking Method: The combination of searing and roasting delivers depth of flavor while maintaining moisture. This method is reliable and reproducible, giving consistent results every time.
- Make‑ahead Potential: The dish can be prepared a day ahead; simply reheat in the oven to restore its crispness. This makes it ideal for busy weeknights or last‑minute dinner plans.
Alright, let's break down exactly what goes into this masterpiece...
Inside the Ingredient List
The Flavor Base
The foundation of this dish is a buttery garlic mixture that becomes the sauce. Garlic cloves are minced finely, allowing their flavor to permeate the butter without overwhelming the palate. If you skip the garlic, the dish loses its signature depth, becoming a plain herb chicken. A good tip: use fresh garlic instead of powdered for a more vibrant taste.
The Texture Crew
The chicken breasts themselves are the canvas for the flavors. They should be patted dry before seasoning to ensure a crisp crust. The olive oil helps the seasonings stick and promotes even browning. Skipping the oil can result in a less caramelized surface, so keep it in the mix.
The Unexpected Star
Fresh herbs—thyme, rosemary, and parsley—are the unsung heroes that bring aromatic complexity. They should be chopped finely to release essential oils. If you’re out of fresh herbs, dried ones can work, but use only half the amount and increase the cooking time to allow the flavors to develop.
The Final Flourish
Lemon juice is the finishing touch that brightens the entire dish. It counterbalances the richness of butter and provides a fresh finish. Without it, the dish feels heavy and one‑dimensional. A squeeze of lemon right before serving transforms the flavor profile into something memorable.
Everything's prepped? Good. Let's get into the real action...
The Method — Step by Step
Preheat the oven to 400°F (200°C). While the oven warms, pat the chicken breasts dry with paper towels, ensuring a dry surface for searing. Season both sides generously with kosher salt and black pepper—this simple seasoning locks in moisture. Place a heavy skillet over medium‑high heat and let it get hot before adding the oil; a hot pan guarantees a beautiful crust.
Drizzle 1 tablespoon of olive oil into the skillet, swirling to coat the bottom. When the oil shimmers, lay the chicken breasts skin‑side down (if they have skin) and let them sear for 3–4 minutes until a golden crust forms. Flip them carefully and sear the other side for an additional 2 minutes. The goal is a caramelized exterior that seals in juices.
While the chicken sears, melt 1/2 cup of unsalted butter in a small saucepan over low heat. Add the minced garlic, fresh thyme, rosemary, and parsley to the butter, letting the herbs infuse for 2–3 minutes until fragrant. Keep the heat low to avoid burning the garlic. This infused butter will become the sauce that envelops the chicken.
Transfer the seared chicken breasts to a baking dish. Pour the warm herb butter over the chicken, ensuring each piece is coated. This not only adds flavor but also creates a glossy, savory glaze. The butter will slowly melt into the meat, keeping it moist during roasting.
Place the baking dish in the preheated oven. Roast for 12–15 minutes, then flip the chicken breasts over to allow the second side to brown. The internal temperature should reach 165°F (74°C). This step ensures the meat is cooked through while maintaining tenderness.
Remove the dish from the oven and let the chicken rest for 5 minutes. Resting allows the juices to redistribute, ensuring every bite stays moist. While the chicken rests, reduce the remaining butter mixture in the pan over low heat to thicken into a luscious sauce.
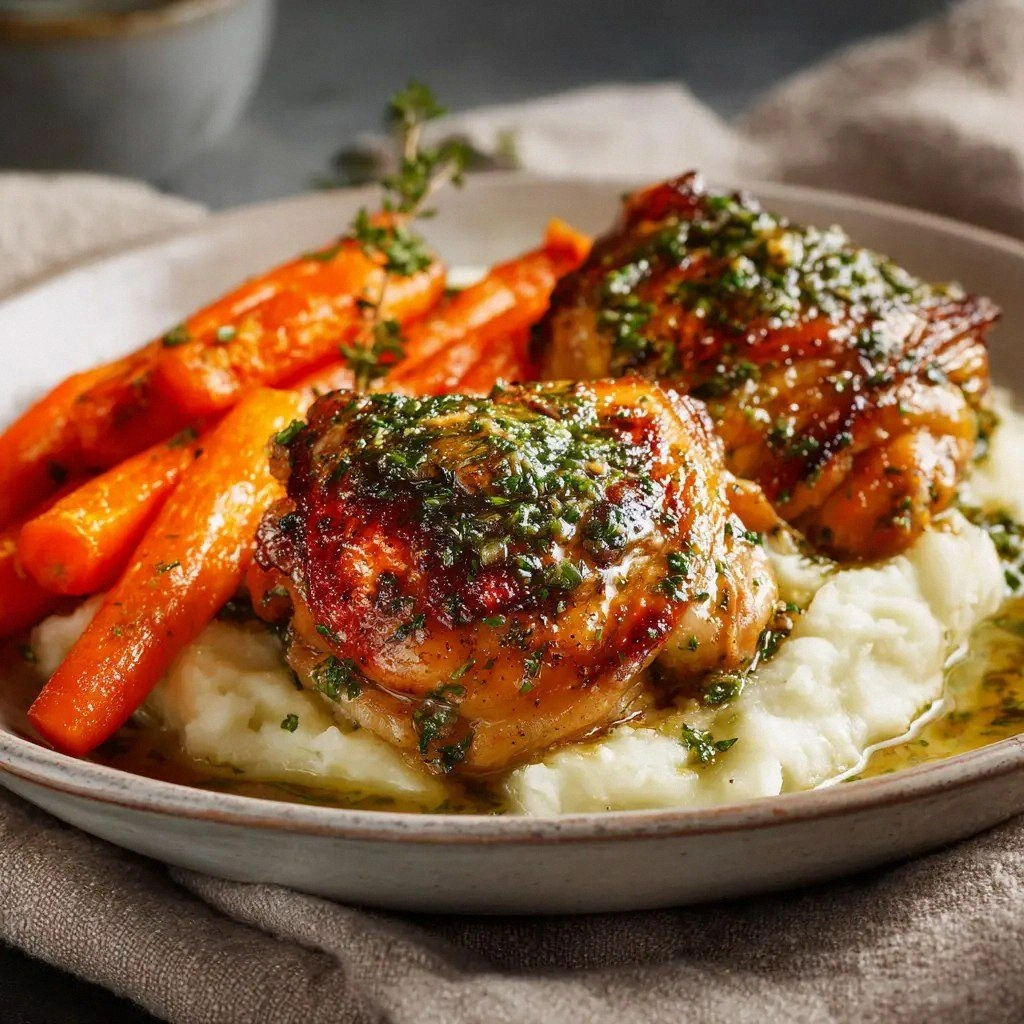
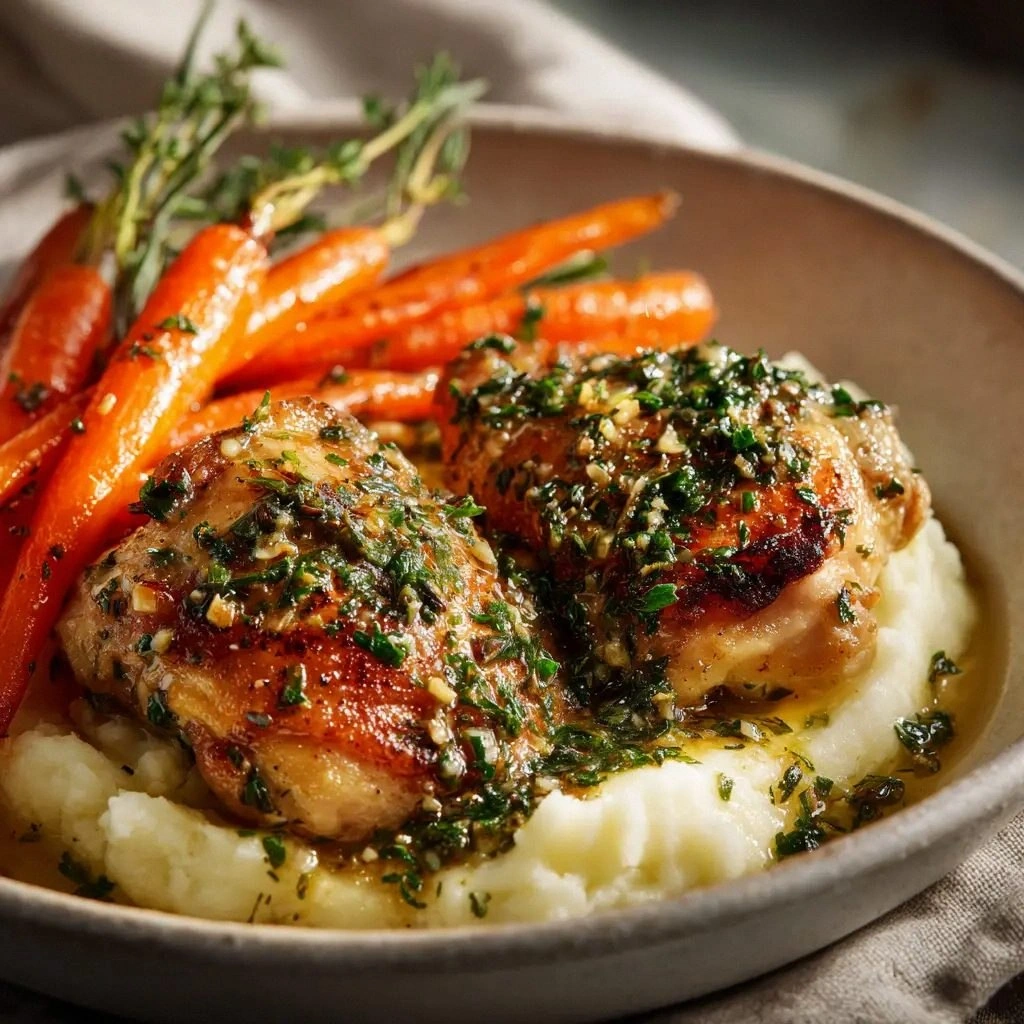
Just before serving, squeeze 1 tablespoon of fresh lemon juice into the sauce, stirring to combine. The acidity brightens the buttery flavor and cuts through the richness. Drizzle the sauce over the rested chicken and garnish with extra parsley for a pop of color.
Plate the chicken with a side of roasted vegetables or a simple green salad. The fresh herbs and lemon finish pair beautifully with crisp greens or caramelized root vegetables. This dish feels both comforting and sophisticated, ready to impress any guest.
That's it — you did it. But hold on, I've got a few more tricks that'll take this to another level. The next section will give you insider tips that make the dish even more flawless.
Insider Tricks for Flawless Results
The Temperature Rule Nobody Follows
Most people rely on time alone, but the oven temperature is the real game‑changer. Set your oven to 400°F (200°C) and let it stabilize before placing the chicken. A consistent heat ensures even cooking and prevents the outer layer from drying out while the inside remains underdone. I once tried 425°F, and the result was a dry, over‑browned exterior that ruined the juicy interior.
Why Your Nose Knows Best
Smell is a powerful indicator of doneness. As the chicken roasts, you’ll notice a rich, buttery aroma mingling with herbaceous notes. When the scent becomes pleasantly fragrant and not overpoweringly garlicky, the chicken is ready to come out of the oven. Trusting your nose can save you from overcooking.
The 5‑Minute Rest That Changes Everything
Resting isn’t just a suggestion; it’s essential. During the 5‑minute rest, the juices redistribute, making the meat tender and juicy. Skipping this step can leave the chicken dry, as the juices rush back to the center. I’ve seen people cut the rest time to 2 minutes, but the difference is noticeable.
Using a Thermometer for Precision
A digital instant‑read thermometer is a kitchen must‑have. Insert it into the thickest part of the breast; once it reads 165°F (74°C), the chicken is safe and perfectly cooked. This eliminates guesswork and ensures consistent results every time.
Finishing with a Lemon Splash
Adding lemon at the end brightens the entire dish. The acid cuts through the richness of the butter and garlic, leaving a clean finish. If you prefer a more pronounced citrus flavor, add a zest of lemon along with the juice for an extra punch.
Creative Twists and Variations
This recipe is a playground. Here are some of my favorite ways to switch things up:
Spicy Cajun Version
Swap the fresh herbs for a tablespoon of Cajun seasoning and add a pinch of cayenne pepper. The result is a smoky, spicy chicken that pairs well with a cool cucumber salad. This variation is perfect for those who love a little heat.
Asian‑Inspired Glaze
Replace the butter with a mixture of soy sauce, honey, and grated ginger. The glaze gives the chicken an umami kick and a glossy finish. Serve over steamed rice for a comforting meal.
Herb‑Infused Marinade
Marinate the chicken for 30 minutes in olive oil, garlic, rosemary, thyme, and lemon zest. This pre‑roast soak intensifies the herb flavors and keeps the meat exceptionally moist. It’s a great way to prep ahead.
Roasted Veggie Companion
Include a medley of root vegetables—carrots, parsnips, and sweet potatoes—into the baking dish. The veggies absorb the buttery sauce, becoming caramelized and flavorful. The dish becomes a one‑pan wonder that’s both hearty and elegant.
Low‑Heat Slow Cook
Cook the chicken at 325°F (163°C) for 25 minutes, then finish with a quick sear in the skillet. This method yields incredibly tender meat and a more pronounced caramelized crust. It’s ideal for those who prefer a gentler cooking process.
Storing and Bringing It Back to Life
Fridge Storage
Store leftovers in an airtight container in the refrigerator for up to 3 days. The butter glaze helps keep the chicken moist, preventing it from drying out. When ready to eat, reheat in a preheated oven at 350°F (177°C) for 10 minutes to restore crispness.
Freezer Friendly
Freeze the cooked chicken in a freezer‑safe bag for up to 2 months. Thaw overnight in the refrigerator, then reheat at 350°F (177°C) for 15 minutes. The sauce may separate; give it a quick stir to reincorporate the butter.
Best Reheating Method
Reheat with a splash of water or broth to keep the chicken juicy. Cover the dish with foil to trap steam, which keeps the meat tender. A quick 5‑minute finish in a skillet adds back the crisp crust.